Showing posts with label home decor. Show all posts

Friday, March 16, 2012

In My Mailbox

Couple of things to round off this weekend and they all start and end at the ol mailbox.   

First, I had to honor of sending out a few gifts to a few friends this week as well as some invitations to someone special's birthday party.  In fact, all of the mail that left our house this week was part of celebrating the ups and downs of parenthood and babies.  We are lucky to be part of such an amazing community spread through out the country.  

And I am currently trying to restrain my inner child from sitting on the curb next to the mailbox in anticipation of my new prints that are coming in the mail from Roll and Tumble Press.  If you've been to our house or follow me on Instagram you know we are some pretty committed letterpress lovers.  And we've got three new beauties coming in the mail from Roll and Tumble today!  Yippee!  I don't want to share all that I have up my sleeve but I am pretty excited about this pretty that will be included in the package:

via

What are you looking forward to like a little kid this weekend?

Thursday, January 26, 2012

Creative Room Makeover {After}

Hey, look!  I am actually following up on an after post on one of our home projects!  As I shared in my 12 in 12 post and in my 
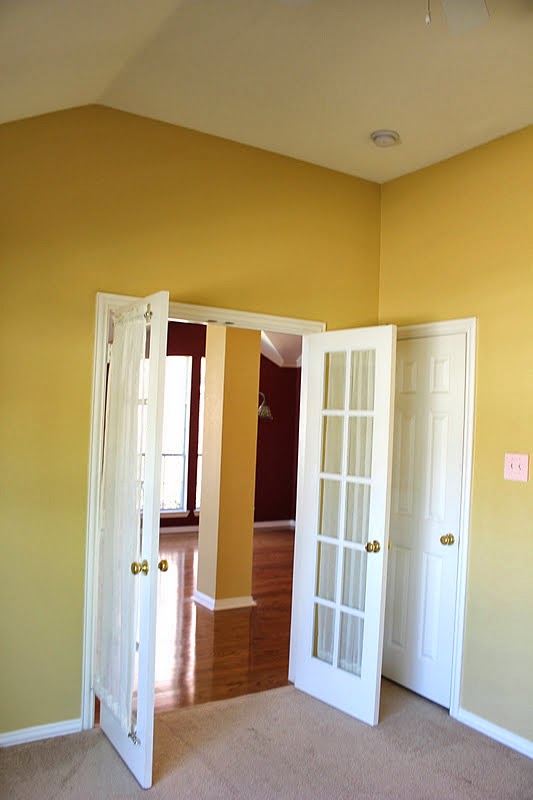
"before" post we have a room right off our entry way that was made for a home office.  It has two closets, which make for perfect storage for all sorts of stuff, vaulted ceilings and a big window.  We needed the space to function in 4 different ways:

1) As a home office for T's day job.  You know we need some space for filing, tech gear, etc. and it also needed to be a space that was acceptable to be seen in the back ground of skype meetings.

2) As a quiet space away from sleeping babes to play music and hang out.  Since T is a musician he needs space where he can write and play anytime without waking the little bear, especially since most of our free time is after she goes to bed.  

3) As a reading nook and library.  We both own waaaay too many books and love to read.  Having a place to store our books and to curl up with one is a must in our house.  

4) Last but not least I needed a space to be able to sew, blog, scrapbook and edit pictures.  

In addition to these four functions, it also needed to be baby safe for days when either of us needed to wrap up a project while the little miss played.  

I think we were able to make it all happen, so without further ado here's our Creative Room:


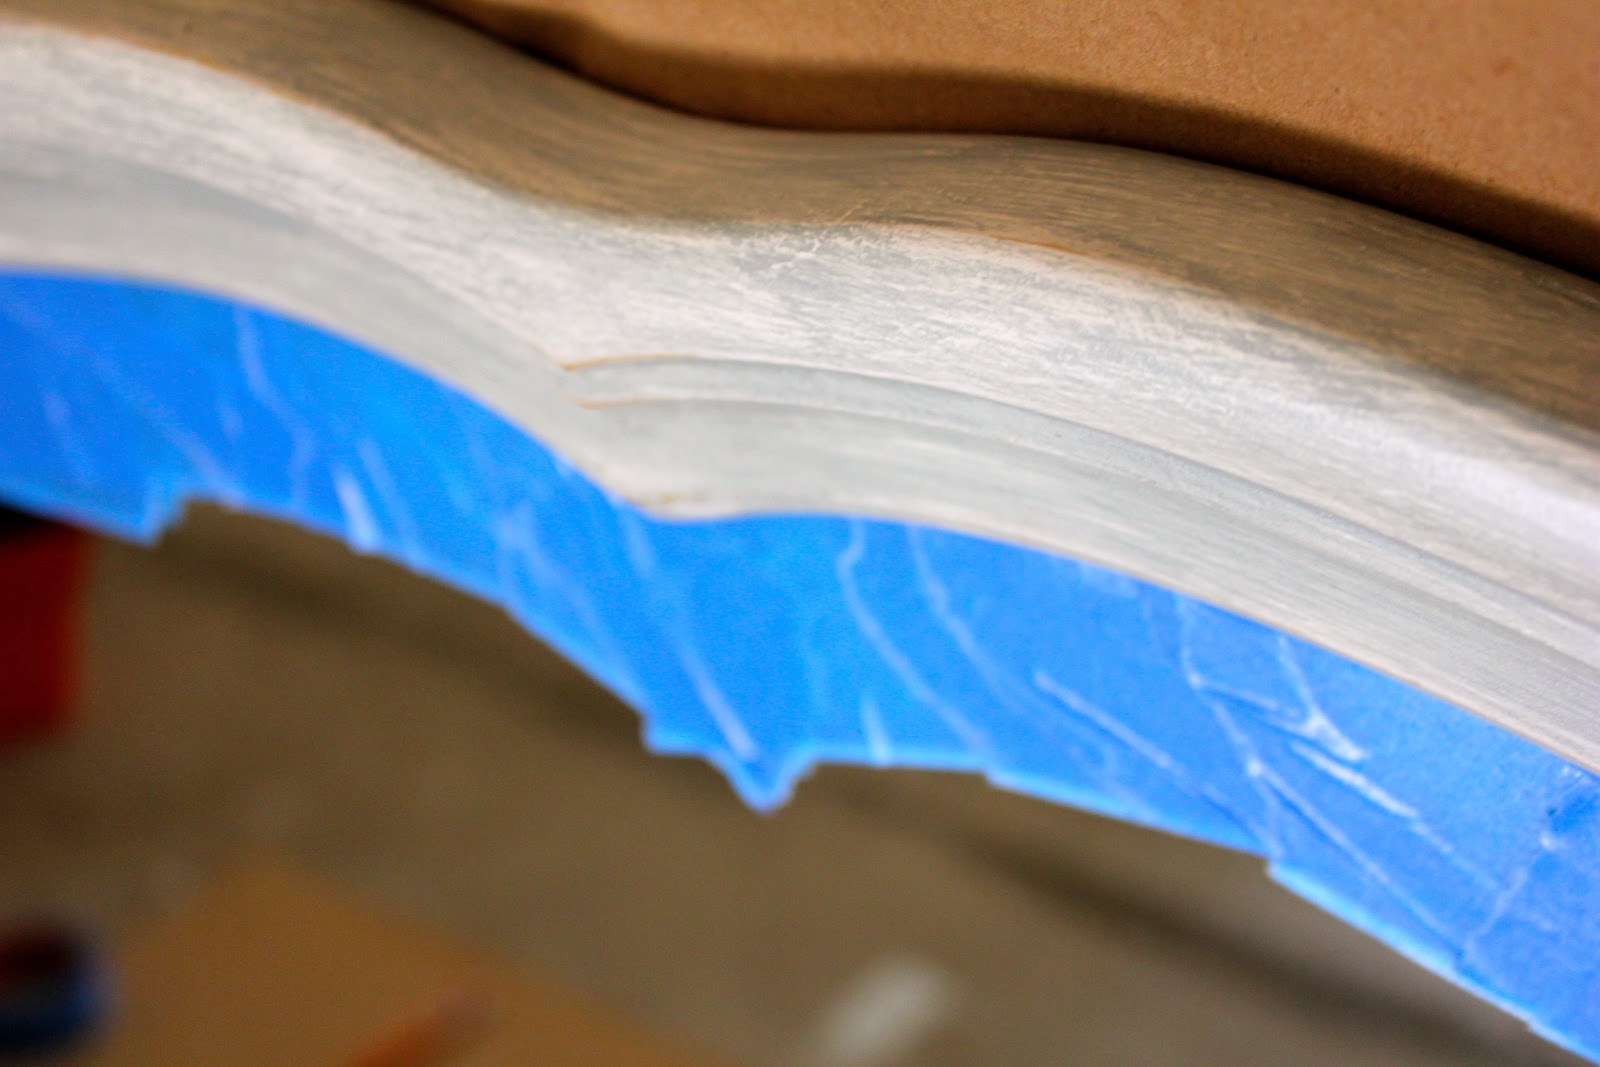
We started with taking everything out of the room as I shared in my before post, so we could paint.  We chose Benjamin Moore's Divine White color matched to Behr Premium paint and primer in one.  I chose Divine White for a couple of reasons, first, the furniture is dark and the red accents bright so I wanted to go lighter and brighter.  Divine White is also what we painted the entry way so visually it would make that space seem continual and draw the eye in and make the art wall the focal point. Plus, I had a gallon left over from the entry way project, so bonus!  It took three coats to cover that yellow up.  Each time we tackle a project to cover the yellow I always under-estimate how dark it the yellow really is--ugh!  

Once we finished painting we brought the furniture back in.  And weeded through some of our books.  Some went to half price, some went to the attic and some went to other areas around the house.  But we slimmed it down so we could add some knick knacks and whatnot.  


This little snail vase is one of my favorite little details.  I found him at a florist around the corner from our house in Indy.  I am hoping in the spring when the selection is healthier at the local green house to pick up a little succulent to plant in there.  


I am too much of a nerd to not organize my shelves according to genre even though all the home decor sources say to organize according to color, but I did try a little color clustering on my shelves with in genre and only did it with colors that would compliment the other colors in the room like the red and cream.  My thought was the colors that didn't fit could blend into one another by not being placed by one another and the colors that did go together could pop.  


The wall the bookcases sit on is the tallest, largest expanse of space in the room with no doors or windows along it, so I had an art wall in mind that could capture some of our loves--music, memories, babies, letterpress art work.  


In the corner across from the chair on the other side of the big window I created a little nook for me to blog, craft and do my thing.  I saw the NORBERG desk at Ikea a few months back and thought it might do the trick and be a space saver.  Really there is plenty of room for another full sized desk, but I thought a desk that could fold down would be good at motivating me to tidy up my mess at the end of the day...so far...so good. Also, I wanted whatever desk we chose for this corner to be able to be used else where in the house because I have a little more in store for this room when we can afford certain pieces of furniture.  


The chair was free.  It was left behind at one of T's gigs a few years back and so we drug it home and it sat.  And sat.  It was originally a dusty, pinky, orange and covered in dirt from outdoor and music festival gigs.  I cleaned it off, sanded off the nasty old paint, primed and painted it with a white semi gloss.  The basket is to keep track of current projects and they stay on the chair (away from little hands) when I am not working on them.  


I organized some of my other items in mason jars on the desk.  Thread and ribbon and whatnot.  I wanted to hang three of the FORHOJA cubbies above my little area for more storage, but alas Ikea is sold out.  Which is probably good because it will force me to find something more creative or unique off Craig's list.  


I am pretty happy over all.  The room is cleaned up, organized and meets all our needs. It also is light and airy and feels more like "us" than the dark yellow.  I am hoping to tweak it here and there, add a few more prints to the art wall, and of course the cubbies about the sewing desk.  And the mister digs it and I know the little miss likes it now because she can actually hang out and play.  


So there it is!  Our little project.  

Monday, January 23, 2012

Creative Room Makeover {Before}

We started 2012 by tackling one of our house projects.  It's by far not our most difficult or daunting project, but we are really happy with how it turned out.  Plus, If we are ever going to get this house feeling like "ours" its going to be room by room one little project at a time.  

As I shared in my 12 in 12 post we have a home office just off our entry and formal living/dining that needs some help being pulled together.  Its actually a great sized room, has two closets and is the perfect space to turn into a space for playing music, crafting, reading and being creative.  

I snapped a few pictures the day we closed on the house to document the "before."  Again, you can see the yellow paint everywhere.  


The yellow paint extended into the creative room and made a room with vaulted ceilings, french doors and a big window seem much smaller and darker that it actually was.  


Since we've moved in we have had a desk and our books shelves in the room but it has mainly been the catch all where we have piled those last remaining boxes that didn't have a home yet.  


And I am horrible at true "before" pictures.  I guess its because when it comes to tackling a project I am SO sick of the before and SO ready for the after I dive in and forget to snap pictures.  But here is one before I snapped with the ol iPhone of the little miss helping with the demolition process.  


I am super excited to share how we transformed the room to meet our needs and create a beautiful space to read, write, play and create.  Stay tuned!

Tuesday, December 27, 2011

Nursery Decor {Handmade Update}

I am totally sucking at sharing all the projects we have been tackling around the house. Sometimes it's hard, because it seems like the book If You Give a Mouse a Cookie, except its more like, if you give a wife a paint brush...she will paint the wall and if you let her paint the walls, she will probably want to paint the trim a fresh white, and if she paints the trim, then she will probably want nice white chair rail. Anyhow, all that is to say, its all in progress right now! And this time around we are hoping to stay in this house for a while so I am trying this thing called patience, where I wait for the exact right pieces to come along and take my time pulling it all together.

With all of that said, I have done some tweaking to the nursery that I thought I would share. Remember how the nursery looked back in the spring when we brought little miss home? If not you can check it out here, here and here. Now, if you were paying close attention to those posts (and you probably weren't!) you will notice that there is a wall missing. It's not just because I am a bad blogger, I left that wall between little miss's closet and door out because while I had a cute coat hook and art print hanging there, it was just sort of blah. You can see it in its full blah-ness here:


And since I sit in the glider staring at that wall every time I nurse or read to or rock little miss, I have had lots of time to contemplate what to do with that space. Our ceilings are vaulted which is awesome, but it seemed like the space was just vast and overwhelming. But I wanted to do something that wouldn't look crazy on a wall with two doors and that would add a touch of whimsy. I thought about bunting, since it's so popular right now. Like these here:

Via

Via

Via
And while I love the bunting, I am not great at sewing just yet. Plus there is the problem of finding fabric. I have been hunting for fabric to sew a curtain panel for the little miss's room for months now with no luck of finding something that coordinates with her colors. So the idea of finding a half dozen coordinating fabric seemed over-whelming and not really how I wanted to spend my time...or money...which brings me to my solution.

Remember when I whipped up that red garland for the mantel for Christmas? Well, it got me thinking and after a few more days and nights rocking in the glider and staring at the big blank wall, I decided that I wanted to make a three dimensional floral felt garland in a gradient sort of color scheme that would fit in with the existing nursery colors but also pull in some colors that could help it transition as the little miss grows up.


I tapped into my existing felt stash and cut the flowers out in as many colors as possible that would coordinate and then hand-sewed them up with coordinating thread.


Then I lined up the flowers so that they graduated from one color family to the next like a rainbow. Then I strung them onto a really long string and affixed each one so they wouldn't slide or move or cluster while I hung them or over time. I really wanted to make sure they were well made and sturdy so they would last.


I hung it by tapping four small nails into the wall as close as I could get them to the ceiling. I then draped the garland over each nail, wrapping the string around the nail once or twice. And luckily when I draped it on the wall the colors fell just right to compliment the art already hung on the wall.


The stats go a little something like this. There are 33 different colors and a total of 66 flowers. The garland measures roughly 40 feet long because I wanted enough to create that drapey effect on the tall wall area above the doors. It took me about two weeks to pull the whole thing together, but it was well worth it.


I think it adds something to the wall that already had the print and hooks without making the room feel too crowded or overdone. And the cost to me was just the time of sewing all the little flowers together and stringing them. So a pretty cost effective project that added a lot of pop!


Now every time I sit in there to play or feed or rock little miss I can look up at my creation, my little crafty labor of love. And the little miss seems to like it too--she likes to look it up at it and smile and point. And she paid it the highest compliment when she first saw it and started bouncing up and down and smiling!

P.S. Did you see the little blue dress hang up on her hook? It was mine that I had my nine month baby pictures taken in when I was a baby and I have big plans to get some photos of the little miss in it this spring--I can't wait!

Thursday, June 2, 2011

Mirror, Mirror

Remember my to do list last week?  My list included plans to re-do the mirror we bought at the McKinney, Texas Trade Days last month.  I already shared that I had plans to paint it Behr's Steam White.  I already had a quart of the Steam White that I purchased when we bought the paint for our master, as I have a plan to do a tone on tone mural. I want the mirror in the lighter, whiter tone because I thought it would go nicely hanging on the wall opposite the mural over our dresser.  

Here's what the mirror looked like before:


It had a sort of teal base with a white wash over it to create a shabby chic look.  But it didn't really work for our house because the white wasn't crisp, it was more yellowed.  You can see what I mean in the above picture.  

So I set up a little painting area in the garage and taped off the mirror.  This actually took longer and was much harder and took more time that I had thought because of the curves in the mirror.  As you can see I ended up using small pieces of tape overlapping.  


After I taped it off I painted the first coat on the top and sides (but not the bottom, as it would have stuck.  With each new coat I rotated the mirror and skipped painting the bottom edge.  Eventually everything got two coats.  If I had to do it over again I would have laid the mirror flat on something slightly smaller so that I could paint each coat all at once.  Ah well, you live you learn.  

After my final coat had dried, I pealed the tape off and then touched up the edges where the tape wasn't applied smoothly (oops!).  Once the touch ups were dried I took a paint scraper to the mirror to clean off any excess paint.  

After placing the hanging wire on the back (it already had mounting hardware on the back) I hung it above our dresser in our master bedroom.  And let me tell you this sucker is heavy (obviously, it is after all a giant piece of glass).  I nearly squashed myself under it trying to get it on the wall!  But after a few tries I got it up there and I am proud to say it is safely up there.  


Here the mirror is above our dresser in the master bedroom. It turned out to be the perfect size--large enough to hold its own on this large wall, but small enough to not overwhelm our short-for-a-long-six-drawer dresser.  


This was a great find and an easy (and cheap) way to add a little personality and depth to our room.  

Monday, May 23, 2011

Adelaide's Nursery Reveal, Part Two

Today we are continuing with our little miss's nursery reveal.  If you haven't gotten the chance check out the before and what we did with her sleeping area.  Today I want to show you her changing and play area.  First up her changing area.  


We decided after reading reviews and feedback to not go with a traditional changing table.  Why spend money on a piece of furniture you only use for about 6 months?  Instead we opted for a dresser with a changing pad on top--when she gets big enough we will remove the pad and ta-da a regular dresser!  I think this is pretty common practice now a days so we are not design geniuses or anything.

For the art work I wanted to work with the same concept as over the crib.  I wanted to support handmade artist and purchase prints that reflect our family's values.  I also wanted to create a collection that could be added to and there is definitely space on the wall to add more art work.  Both prints are from Sugar Fresh and you can find these prints and more in Sugar Fresh's esty shop. I love everything in this shop, so you can plan to see more things pop up in the little miss's room from there.  Since the ceilings are so tall in here I am hoping to build the art collage on the wall upward to really take advantage of the height.  


Our lamps all came from Target and go with the clean, simple, modern look and were really affordable.  Truth be told I struggle with lighting anyways. I am not very good at picking out lamps and they are so pricey for a very basic feature, but I know they can finish off the room. Sigh!

The owl is actually one of a pair of book ends (you can spot the other one a few pictures down) that I found when I was out shopping with my aunt last fall in Dallas.   I was at the end of my first trimester and found these little guys in Coldwater Creek of all places!  My aunt was really worried that the owls would scare the baby but I bought them anyways and I think they are cute!  You may remember them from another post because for a while I used them in our dining room at our old house while we were for little miss to arrive.  

For the big wall we wanted to create a book wall, because reading was so important to me as a child and we want her to grow up learning to love books.  Plus it was a really inexpensive way to decorate a huge wall, since most of the book were either my childhood books or gifts from a few amazing friends.  We purchased the picture ledges from Ikea.  They were really easy to level and mount compared to shelves I have bought from other stores.  


A couple of special things about this area.  The bookcase you see there to house toys and books and such is a bookcase we already owned. It was one of those hand-me-down pieces that T had in his apartments in college, that he brought into our marriage.  It moved with us from each house and with each move we would have the same conversation, "do we really want this ugly thing?  It doesn't go with our house at all...but its solid wood and they just don't make them like that any more..."  I wanted a shelf area for toys that was low enough I could set a glass of water on it while rocking our little miss to sleep and so when we moved yet again into this house and were having that same conversation about the bookshelf I had an "ah, ha!"  Why not have T paint it white to go in the nursery?  We already had the white paint left over from another project and with just 10 minutes each night after work a few nights in a row T put a couple of coats of paint on it and ta-da!  The total cost for her perfect little bookshelf/side table is free!  Got to love it!

Also, if you remember I had been debating whether or not to purchase the large letter A from Antropologie.  Well I finally decided to take the plunge.  I was explaining to a friend of mine how I wanted it but it was pricey and she said, "Well, its really hip and modern and neutral and since your daughter's initial will be the same her whole life, its a piece you can incorporate into each of her rooms as she grows."  Sold.  In fact, under that logic it made more sense to buy that than the bedding :)


The other special piece is the Raggedy Ann doll that a dear friend of mine hand made as a gift for our little miss.  She had heard me share once that my childhood room was decorated in Raggedy Ann that my mother sewed together and so wanted to make my little girl a doll that connected her childhood to mine.  Is that so thoughtful?


She loves laying on the floor of her room and staring at her wall of books.  She as even smiled at them a couple of times and I am just going to pretend that its not gas and that she really likes the room we created for her!  

Want to see the whole room? I'll be back next week with a final post so you can see the layout and a few other details!   


Wednesday, May 18, 2011

Adelaide's Nursery Reveal, Part One

I am really pleased with how the nursery turned out.  As I already shared I wanted a room that was light and airy, that was a peaceful place I would want to hang out in those first few months and that she would want to spend time in and retreat to sleep and be calm.  I am really please with how it turned out and will only have a few plans to tweak it as she grows and her little personality starts to show.  First is her sleeping area:


I wanted a sort of collection of art work for over her bed and changing table that reflected our family values and that I could add pieces to as she grew and as I found the right pieces in our travels and adventures (and etsy trolling).  I am really pleased with how it turned out for now.


Clockwise starting on the far left: Love Spoken Here print found here, hand stitched Some See Weeds Others See Wishes done by yours truly, and Alphabet Print found here.  I am hoping to add a few more prints and a few photos of our family there as well.  


Our bedding as I already shared I found via Dwell Studios but pick up via a online store that had it discounted.  The sheets were a bit of a pleasant surprise. They were supposed to be a small polka dot but instead they all came in this modern floral print.  I would have sent them back except I liked the mistake better than what I thought I was getting!  I really like that its not traditional pink and that its not a pink explosion.  Its sweet and subtle and modern.*


Want to see what we did with her changing/play area?  Stay tuned!  

*And before I go down as the worst mom ever...yes, that's a bumper.  Yes, I know that they are now deemed a safety hazard.  I put it in crib while the nursery was set up and until she actually sleeps in her bed.  Once she starts sleeping in her bed and/or starts moving in her sleep it will be removed.  But until then I am going to enjoy the way it looks and check the ties regularly for security.  


Monday, May 16, 2011

Over the Weekend

We had a great weekend spending most of it with family and friends relaxing and enjoying the unseasonably cool weather here in Texas.  Of course, we were too busy having fun to take any pictures!  But luckily I can share some pictures of the aftermath of our Sunday adventure.  After a delicious breakfast with family on Sunday T and I load up little miss and headed out the Third Mondays Trade Days in McKinney, Texas for an hour or so.  I used to trek out to First Monday Trade Days in Canton, TX with a girlfriend of mine back in college.  Not only are there all kinds of vintage pieces to be discovered and refurbished but the people watching is superb.  T had never been to a Trade Days but being the American Pickers and Pawn Stars junkie that he is he has been dying to go.  And since we have a new home to decorate on a tight budget I was happy to go and begin to hunt down the pieces we need for a few spots in the house.

The afternoon was cool and breezy and little miss was happy to nap in her stroller so we scoped out the goods.  About midway through our search I found a beautiful, but worn vintage bed frame for a full sized bed and a rather large mirror.  The woman selling them was eager to make a deal, but I declined and said I would need to think about it and maybe we would be back.  Still only being 6-weeks after the little miss arrived, I get tired sort of easy and it really affects my decision making ability.  Just ask T--I drive him crazy trying to make simple decisions like what to cook for dinner.  So I was tired and not so sure about the bed.  It would need love and paint--two things of which I have and it would need time and energy--two things of which I have very little currently.  T was ready to put his months of watching Mike Wolf to use to negotiate the pieces for me but my fuzzy brain decided to pass.

So we meandered around the market a bit longer and then headed home to feed the little miss.  After we got home I took a rest and a shower--but I couldn't get that bed out of my mind.  I knew it was just like a few vintage ones I had seen online that would go well in our guest room.  And the mirror was large and priced well and we have more than a few spots for it to go in our new home.  Sigh.

By this time T had gone to run a few errands and I texted him that I was having second thoughts and that I couldn't get the pieces out of my mind--something I have learned to trust as part of my gut.  There is nothing worse than thinking about something you should have pounced on for days or weeks to come--am I the only one that does that?  Probably not.  Anyhow with only an hour til the flea market closed T dashed back over there, bargained the lady down and brought home the two pieces (little miss and I stayed home--we are not exactly fast acting companions these days).

Here they are:


My apologies for the not so glamorous photos but you can see the mirror is probably 4-foot by 3-foot and the bed will look great after some love and a coat or two of paint.  And even though this little mama is running on an average of 3 hours of sleep to keep this sweet little house and family going, a girl can dream.  Plus T was happy because his newly acquired bargaining skills paid off!

Sunday, May 15, 2011

Adelaide's Nursery Reveal, Before

As you may remember from these posts here, here and here we had already begun pulling together our nursery in Indianapolis, before we got the news that we were Texas bound.

So we packed up the nursery our little girl would never see but was none the less planned in love and brought it to Texas, where we added, tweaked and made it the perfect place.  All in less that a month too!

First, the before.  I have yet to post all the "before" pictures of our house.  I figured as we tackled each project I would post them along side the "afters" or more realistically the "in progress" pictures.  But let's just say this.  The house we bought was well cared for, loved and decorated--just not in our style.  But you know I love a good home project especially anything that involves a fresh coat of paint.

So the little girl's room like most of the rest of the house was painted yellow.  Event he vaulted ceiling was painted yellow.  You can see it here:


Since we closed on our new house and moved when I was 36 weeks pregnant my family rallied and came to help us unpack and paint--they were amazing! We tackled the nursery and the master bedroom (more on that later) as our top priorities.  My brother and his fiance painted the nursery and did an amazing job.  I chose Behr's Chocolate Froth for her walls because its a nice light, airy neutral with a pink tint and it has this fabulous way of changing colors in different lights.  The ceiling we brought back to a standard ceiling white, which really lifted the height of the room and brought more light in, since you can see, there is just the one, small, south facing window.  For fun, here are my two painters for the nursery:


So her room was yellow, dark and just didn't feel like "our" house.  Want to see what we did?  Stay tuned!

Sunday, March 27, 2011

This Old House

We did a lot of cosmetic work in our old house. I wasn't blogging at the time and so did a horrible job snapping before pictures so now that I have afters, they are sort of out of context.  I learned my lesson and took TONS of before of the new house the day we closed, so I could document the journey of making this new place ours.  But since 1) I may not have any other reason to post some of my favorite shots of our old house 2) I hope to already have a few before and afters of the new house to post soon and 3) I am pretty proud of what we did, I thought I would share.


This was an area of our dining room.  Our dining room was originally yellow.  I used to describe it as "tuscan yellow" until I was standing outdoors one day talking to a friend about the paint color and saw a school bus drive by and realized it was the perfect color match.  Since I like light and airy, I went with Behr's Chocolate Froth above the chair rail and Behr's Wheat Bread below the chair rail.  Not only did it double the size of the room, but going with the two tones in a lighter color really lifted the ceiling of the room and made it seem taller--a welcomed trick in a 1923 bungalow! 


I am not going to lie, we bought this house for the kitchen.  We wanted to live in a historic neighborhood, but I just didn't have the budget of the patience for the full kitchen gut most of these house require and or need.  And it was just perfect.  The floor tile was a terra cotta with a one inch cement grout.  The first thing our realtor said when he saw it was "this will really limit you on the resale--not everyone likes this look."  Let's just say that it was the first thing people complimented us on in the kitchen, even before the lead glass cabinets or granite counter tops.  Can you tell I just loved it?  The one thing we did do was find appropriate fitting furniture for the space.  The previous owner had this round table there with three chairs--it was really crowded and didn't suit the true "nook" feel (and square footage) of the space.  The print came from Hatch Show Print's store in Nashville and was a limited run they did for a winery that they designed and print the labels for that we actually really love.  


This was the room off our living room.  Technically a "third bedroom" because anything with a closet counts in historic homes in our neighborhood, it was accessed off the main living through french doors.  We used it as an office, crafting space and general hang out space.  part of what we wanted to accomplish with this room was to keep it nice and open because when we kept the french doors open (which was always) it made the living room seem larger.  

I have to confess I debated posting these pics because while this is the room that my little sis and T painted for my birthday I am still not convinced that I picked the right paint color.  Ah well, live to paint another house, right? 


This is just one of my favorite little areas of art found in our dining room.  Sorry the picture is not that great--I was still figuring out my camera.  The one on the left I ordered off etsy (sorry can't remember where) and the one on the right is a framed copy of our wedding vows that T had laid out by a friend and graphic designer for our first wedding anniversary.  I added the birds, which were originally Christmas ornaments made of recycled paper, that I turned towards each other to look like over birds and hung above the frame.  


Another favorite area of mine was our bar.  A friend of mine was retiring and so was downsizing into a condo.  He had a entire book box full of all the match books he had collected traveling all over the world from the 60's through the 90's.  They were so cool I couldn't pass them up.  I then got the hurricanes from West Elm and while I was playing around with them, I got the idea to use the vintage matchbooks as part of our bar decor!  The funniest part of this little display is that for about a month this winter we did light any candles because we had run out of matches in the junk drawer--until we realized that we actually had tons of matches--right out there as part of our decor!  Sheesh!  

The owl is actually part of a pair of bookends that I found of all places shopping with my aunt at Coldwater Creek back in the fall!  I saw them and knew I wanted them for the nursery even while my aunt was insisting that the owls would scare the baby!  But since the nursery was in progress I set one out here on the bar and made it a temporary home in the fall and just ended up staying through winter. 

Hope you liked the quick home tour of our old place.  There are still a couple of other projects and such that we did that I never got good pics of--but like I said we live to re-do another house!  

Thursday, January 13, 2011

Nursery Decor, Part 3

Next up for our nursery decor post is the art work and accessories.  A few of these pieces are not yet here and up on the walls yet, but they should be here any day now and I can't wait! 

First up is this adorable print from Tuesday Mourning's etsy shop.  She has so many adorable prints I could see in our little girl's room but like the rest of the art in our house we liked this one because it reflects our family's commitments and love for one another--what better things to surround our little one with!


Next up is the ABC Animal Print from Fancy Print's etsy shop. 


And our third little etsy find is from Sugar Fresh's shop.  This shop's prints are so bright and fun I could see them popping up in future rooms. 


One item I have contimplated purchasing is this giant letter initial from Anthropologie:

The only problem is that like most lovely things from Anthropologie the letter is sort of highway robbery!  However, when I was telling a friend of mine about this crazy expensive letter for the nursery she said, "well look on the bright side, you kiddos name is not changing.  You can just incorporate the letter into everyone of thier rooms you design."  Good point.  Let's see if T and our bank account appreciate that argument. 

Finally, our lighting fixture.  We went with the smaller MASKROS lighting fixture from Ikea.  And I will just go ahead and say I LOVE it.  It helps tie the nursery in with the rest of the house, adds some softness to a room that has dark, heavy wood furniture and adds a bit of girliness to the tan walls. It creates that boyancy and playfulness.   


We had an electrician come in and install it (since I made a promise to T and my mother that I wouldn't do electrical work while pregnant) along with some new fixtures in our living room and library. 


Now as soon as I can get these prints in and up on the wall I will do some picture of all this decorating pulled together.