Showing posts with label crafties. Show all posts

Tuesday, May 14, 2013

Tuesday Crafties {Painted Blocks}

Today's Tuesday Crafties is a Toddler Crafty...we decided to paint our own set of wooden blocks.  Over the winter I had made several sets of Olio blocks as gifts.  I had some left over plain wooden blocks that A ran across in my craft supplies and asked her favorite question, "paint, mommy?" So I said "sure why not!"


I picked three colors to keep it simple, using a acrylic craft paint and adding a bit of water to keep her little layers of paint thin. I also put a separate brush in each color to prevent too much mixing.


We didn't wear a smock with this project (but should have).  We totally own and recommend this one if you are looking for one.  

Thursday, March 29, 2012

DIY Kid's Felt Board

I really like this project because it's one of those awesome projects that can be as simple or as elaborate you you have skill/time/desire.  You can add and make more pieces or you can stick to the basics.  And the truth is the little is going to love it either way.


Here's what you will need:
1) An art canvas or board (I used two 14x11 canvases)
2) two paint stir sticks (if you are making a larger board using canvases
3) Felt--you will need one large piece at least 27"x19", a second smaller piece about 14x22" for the back and then a few smaller pieces in varying colors
4) fabric scraps in various prints--I used a mix of some vintage and new scraps from my stash
5) scissors 
6) staple gun
7) fabric glue (I recommend Beacons Fabritac)


I chose to use two art canvases for two simple reasons.  First I already owned them so I didn't have to spend any money. Second, the two together made the perfect size to rest on the floor in front of little bit and give her plenty of room to work her creative magic.  But mostly it's because it's what I had to work with--if you have a board left over from a project that would work great too!


I measured and cut the felt for the front of the board first. Then I turned the canvases over and using my paint stir sticks as a brace stapled them to the back of the frames.  You can see below it creates a nice, stable connection for the two canvases.


Next I wrapped the felt around the front of the board and securing it to the back with the staple gun.  After that I took a second piece of felt and glued it over the back to conceal the the staples and keep it safe for little baby hands.  


Here's a shot of the back of the felt board. after I covered it.  


And here is the front.  I added hand embroidered felt grass to the bottom to add some detail and charm.  I also wanted to make a few felt animals for the board so thought the grass would make it more fun to play pretend.  


To make the alphabet I cut out each of the letters in fabric and then in felt and glued the fabric to the felt. I had originally planned to sew them together, but When I tried one, it some of flattened and made them weird.  Plus it would have been a VERY tedious process.  So instead, glue :)


I also created a set of primary colored shapes, a few animals and a few hand sewn flowers to make it fun.  Maybe I will add of few other things as she grows--as set of numbers maybe and a few more animals.  


I am so excited for little miss to start playing and learning and enjoying this new little project.  And the best part is I can move it from room to room so we can take the entertainment with us around the house!  

Tuesday, February 14, 2012

Tuesday Crafties {Baby Crafties}

Over Christmas I got a few gift cards to Amazon and after pooling them together I was able to snag a new toy camera.  You can see how excited I am here.

Anywho, I ordered it with plans already in mind for how I might use it to make cute little crafts.  So since it arrived last week me and the little miss have been busy trying it out and making our first little projects.  

First up we finished our Christmas thank yous.  Since we receive several thoughtful gifts each year via mail I thought snapping a pic of little miss with her beloved new item to incorporate into the thank you would be super cute. Here's the thank yous:


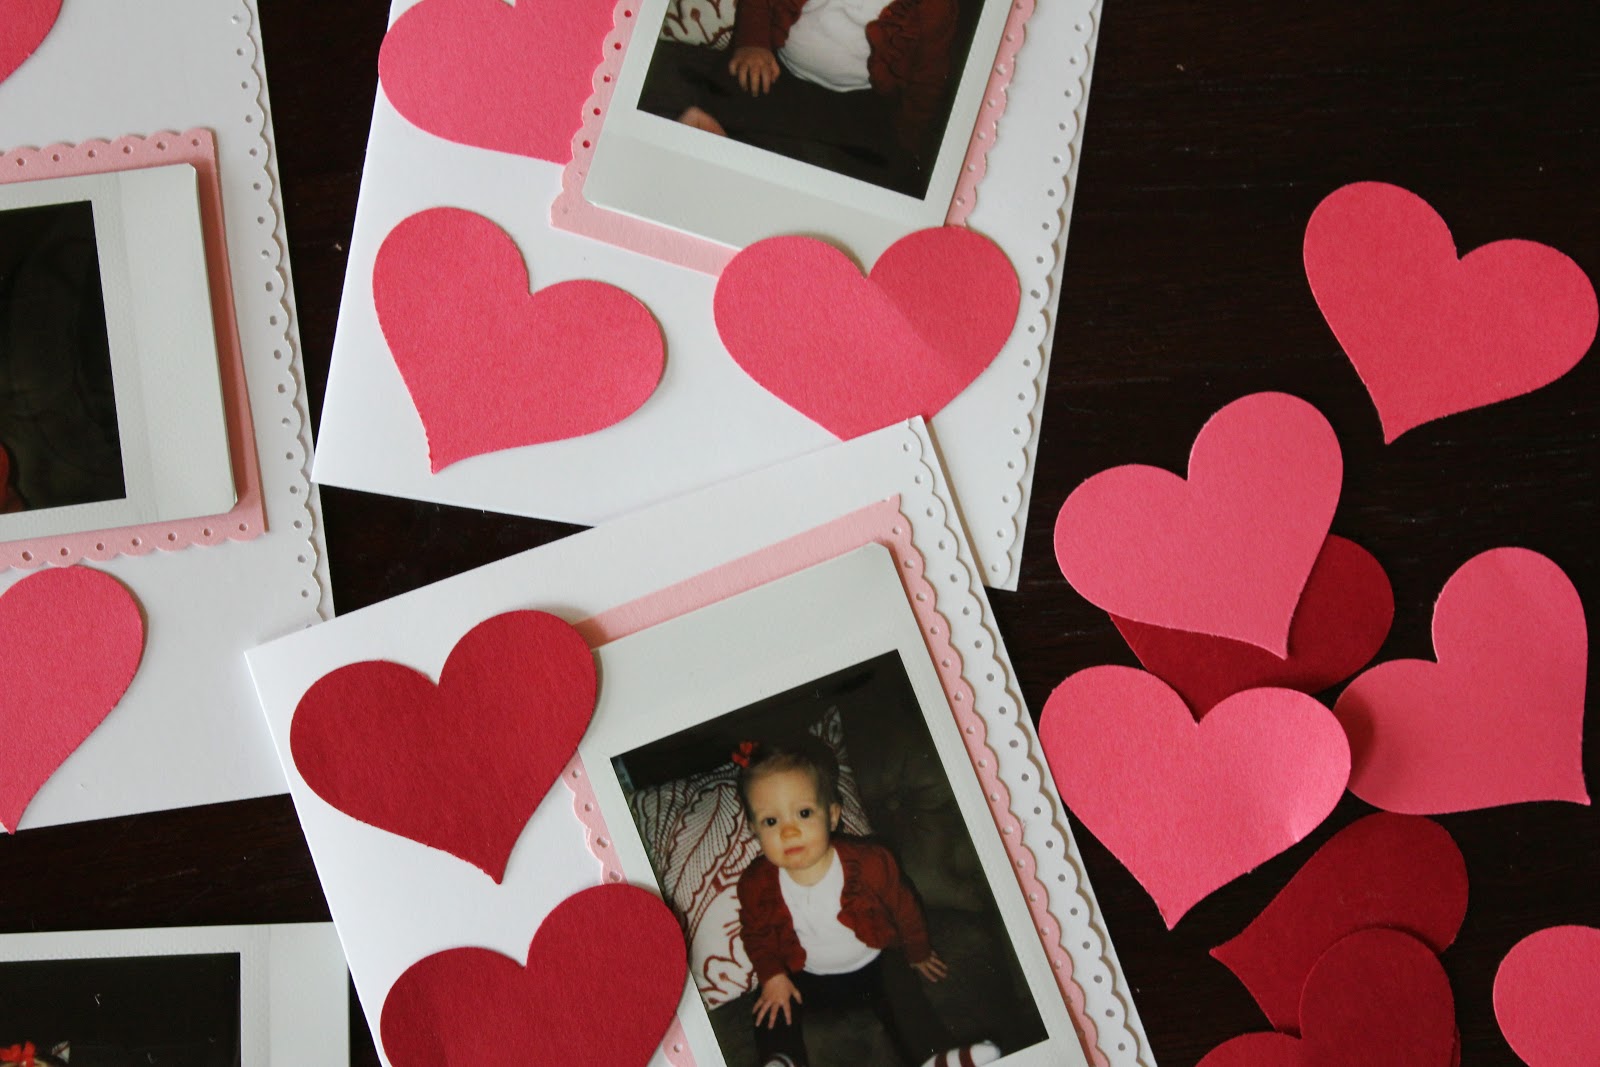
And since this is the little miss's first Valentines and since she can't really make Valentines without some major momma assistance, I thought I would use the camera to help her make a few Valentines for her loves.  


Not too bad for my first two attempts with the camera.  Hope you have a wonderful Valentines Day!  

Monday, January 30, 2012

Valentines Baby Headband Tutorial

Happy Monday!  Hope you had a great weekend.  Do you ever sit down to write on Mondays and honestly can't remember a thing about your weekend?  That was me this morning.  We had a good weekend--grabbed dinner with friends, rented a movie or two to get caught up for awards season.  

Last week I shared little miss's Valentines inspired heart headband and today I wanted to share a little tutorial so you can make one of your own!


To make your own headband you will need: 

Red and white ribbon.  I got this spool as a gift from my aunt (does she know the way to my heart or what?) 

Measuring tape

White elastic (the softer the better--this is for those soft baby heads!)

Two 4" by 4" pieces of felt one in red and the other white

White embroidery thread

Fabric glue (not pictured)

Small binder clips, chip clips or clothes pins (not shown)

A scrap of graph paper and a pencil (optional)

First you will need to know what size baby head you are working with.  You can do this either by measuring (which can be tricky--they are very wiggly subjects) or what I prefer to do is use the head measurement from our last doctors's visit and add an eight or a quarter inch to that measurement for each month past the visit.

Now, measure and cut a 4 inch piece of elastic.

After you have done that, subtract 3.5 inches from your measurement.  That is the length you need to cut two equal in length pieces of ribbon.

Now, this is the trickiest part (and it not that tricky!)...lay one strip of ribbon face or polka dot side down.  Run a moderate strip of glue down the entire length of the ribbon adding extra glue on the last quarter of a inch at each end.


Next take the other piece of ribbon you cut and lay it face down putting glue only on the last quarter inch of each end.

Now take the elastic and lay the last quarter inch of the elastic on the last quarter inch of the first ribbon.  then fold the second ribbon over on the elastic and first ribbon, pressing along the way and removing any excess glue with your finger.

When you get to the last quarter inch of ribbon bring the other end of the elastic around and place it between the two ribbons and press firmly.


Now take your binder clips or clothes pins and clamp them where the ribbon and elastic meet.  Set aside to dry.

While the headband is drying cut a heart shape out of your read felt.  I free handed mine but if you aren't great at free handing use a piece of graphing paper to sketch out a pattern.


Using the red heart as a guide, cut two hearts out of the white felt that are an eight of an inch larger all the way around.

Using the embroidery thread and a straight stitch stitch your read heart however you would like.


Take the read heart and glue it onto one of the white hearts.  After the headband is finished drying take the two white hearts and place glue on them and press them around the ribbon just off center.  Wait to dry and then try it on your little model!


I would love to see how yours turned out!  

Tuesday, January 24, 2012

Tuesday Crafties

Valentines Day is just around the corner and I now have two loves to think about this year!  For my little love I wanted to fix her up with something cute to sport this spring and beyond.  So I made a quick headband she could wear on her baby adventures. You know, cruising the house for lint to taste, pulling up on the couch and practicing all our new sounds.    


Doesn't my little love look so cute...and so stinkin' BIG?!?!  

I really like being able to make her little things and I hope that when she looks back on her childhood that it's some of these handmade things that are the most precious to her and that she can see they were little labors of love. 

Pssst...want to make your own?  Check out the tutorial I posted here!

Tuesday, January 17, 2012

Tuesday Crafties {Baby Crafties}

Adelaide is getting to the age where we can do some age appropriate little projects together.  After all, she made her first piece of art work at church already!  So this week I thought I would finally tackle the whole "baby's footprint and handprint" pages in the baby book I spruced up earlier this spring.  Yes, this would have been ten time easier when she was little, little but better late than never right?

Here's what you need to get those little baby paws down on paper for posterity:


1) Paper, pages from the baby book or card stock (what ever you want/need/have)
2) A non-toxic ink pad 
3) baby lotion
4) a wet towel or dish cloth

So set everything up--pages, ink pad and wet cloth before getting started.  Then I took my willing little assistant and applied lotion to her hands and feet and to my hands.  The purpose of the lotion is to create a thin barrier between her hand and feet and the ink, thus making it way easier to wipe off.  Putting it on my hands did the same thing.  That's my big secret trick for this whole project.  Then I did her feet first to get her used to the idea and placed each one on her page, wiping them off in between.  


Finally I did her hands which proved to be waaay trickier and a wee bit unsuccessful because we are at the age where we are the master and commander of our hands.  But it was a fun project to do together and now I have a little something in her baby book to remember those cute little piggies. 


Friday, December 16, 2011

A Quick Holiday Card Display

I love getting all the holiday cards in the mail--catching up with people, seeing all the cute pictures of the kiddos and grandkiddos.  Instead of keeping them in a basket or in a stack on the kitchen counter, I wanted to create a quick display so I could enjoy our cards a bit more this year!  

I took bakers twine and hung up two 3 foot strands and took tiny clothes pins to clip the cards up.  


Over the top I hung a little JOY banner that I made with three doilies and a cool font I found and saved from Martha Stewart but I can't find the link now to the pdf (If you know--let me know and I will link it up!).


These are not the best pictures on the planet--I took them too late int he day, but I really wanted to share this project before the holiday passed by!  


Tuesday, December 13, 2011

Tuesday Crafties {Pinterest Edition}

I am hardly ever an early adopter of ANYTHING technology or social media related.  But I was one of the early adopters of Pinterest and it been so fun to see everyone hop on board.  I love having a landing spot to collect and organize online ideas and inspiration.  Some of the things I pin are connected to larger projects around the house that I am working on in the long term, some are for when the little miss grows up a bit.  But I definitely didn't want to get into the habit of pinning without actually trying some of the ideas I pinned.  

When I saw this necklace tutorial from ECAB, I knew I wanted to try it because it looked so much like other necklaces I had seen at places like Anthropologie.  


I will spare you the play by play, as Jessica did a great job with her tutorial, but I did take some creative liberties to make it my own.  Since I already have a beautiful turquoise necklace I found in San Francisco on our vacation last year, I decided to go with black bead to meet a need in my own wardrobe.  I also went with three strand in each braid rather than two to create some thickness.  


I am pretty proud of how it turned out!  Have you tried anything you have pinned?  How did it turn out?


Tuesday, December 6, 2011

Tuesday Crafties

I am super excited for this Tuesday Crafties to be sharing a new crafty and our mantel decor.  I didn't go all out decorating the mantel this year, partly because this is our first time ever with a fireplace mantel and I am still sort of wrapping my head around it and partly because we keep it simple round here and the tree is only a mere five feet away and I didn't want it to feel too crazy in here.


Anyhow, I made this simple felt garland to bring in a warm, Christmas feel while still complimenting our existing art work, etc.  I also think that because the garland ties into the existing art work and adds a touch of warm, cozy it may be the kind of thing that transitions our decor from Christmas to winter.


When T saw me hanging it he laughed and said "only we would hang garland from our collection of show posters!" I guess he is right, but that's the point.  To make and decorate this house into something that is "only us."


What kind of things do you incorporate into your decor that are totally representative of your family?

P.S. Want some handmade garland of your own?  I have some listed in my shop!


Tuesday, November 29, 2011

Tuesday Crafties {Thanksgiving Table}

So here's a few quick glimpses of our Thanksgiving table and especially our place cards which doubled as our napkin rings.


So I used what I had in my craft supply and took gift tags, stamped a little holiday greeting plus the name of the person whose place it was on the tag.  I then ran the tag ties through a button, tied it off around the napkin and finished it off with a sprig of orange dried flowers. I like the way it turned out and that I used what I had to add a nice little detail to our holiday meal.


Did you do anything to add a special touch to your holiday? 

Tuesday, November 15, 2011

Pretty As the Morning Launch and Giveaway

I am really excited and nervous for this post.  Maybe only a handful of you dear readers know that I originally started this blog two years ago in the hopes of launching a shop on Etsy, to track my journey, share my work and network with other creatives.  But as you know, life got in the way, in the very best ways.  And I never felt like I was fully ready or it was ever the right time.  

But two things happened recently that gave me the shove I needed.  First, I read this article by Jess over at Makeunder My Life and it really struck a chord.  I am a perfectionist to the core. And I realized that I might not ever launch the ol etsy store if I waited until I got everything done and everything was "just right." A few weeks later and I was sharing this with my friend Jen (by the way this girl is crazy gifted in the crafties department, check out her Flickr stream here.  But I warn you it craft-intimidated me for sure!).  I shared with Jen my concerns about launching, things I wanted to do/have done, etc.  And she just sort of laughed at me and said, "Those things are like the littlest things when it comes to selling online, really, no big deal.  They could be done later, after you start, you know, actually selling things."  Well, when you put it that way...

So I did it!  I launched my shop last week!  It is a small start and its definitely not a perfect start but it's a start.  And to celebrate I want to do a giveaway, since a) I feel like celebrating this small accomplishment and b) I've never done a blog giveaway yet!  So I am giving away one item from the shop to one lucky reader.


Entering the giveaway is simple. Pop over to the shop and check it out (and if you want to tell and friends or two or ten) and leave a comment in the comment section below.  Also, I will be adding new items through out the week so keep checking back.  I will draw a winner on Monday, November 21!  

Tuesday, November 8, 2011

Tuesday Crafties

Its been a while since I have done a Tuesday Crafties post.  Not because we haven't been being creative over here, but because we have been tackling some big house related projects. So, while I know it's not terribly original, I will leave you with a quick hair bow I pulled together for the little miss's first trip to the pumpkin patch this season.


Some felt, a vintage button, and some ribbon and we were the cutest little gal at the patch.  plus I used a different kind of clip this time so the flower can go into her hair or clip on a hat when she is over the whole headband thing.   

What have you been crafting lately?

Tuesday, September 13, 2011

Tuesday Crafties

When I was in the third or fourth grade my mom gave me two vintage needle point kits that made complimentary portraits of plants.  It was meant to teach the different stitches and it was so much fun. I wish I still had them.  I was thinking about those a few weeks ago and wanted a way to job my mind and my fingers on all the techniques, so I decided to do a little floral doodle on a kitchen towel.  


I haven't decided yet if I am done with it or if I will fill in a few spots with greenery and leaves or not, but I am pretty happy with the way it turned out.  


I think my favorite part are the purple flowers that I did entirely by french knot.  It took the longest but it looks really good.


What things did you learn how to do as a kid that you wish you still knew how to do?  

Tuesday, September 6, 2011

Tuesday Crafties

Happy Tuesday, I hope your holiday weekend was fun and that you are off to the start of a great four day week! Usually these 3 day weekends totally throw me off but we got up and at em at our house and are tackling our to-do list. I am really excited to get back to my regular Tuesday Crafties post, I have really missed sharing them and have some awesome little projects I've been working on lately. 

My little sister leaving the nest and has taken a job to be much closer to our family here in Texas.  To say I am excited does not do it justice.  As I write this I want to follow each of my sentence with four or five exclamation points like I am a 13 year old girl, but I will refrain!  Anyhow, since she is getting her first place and has nothing, I thought I would pull together a care package of sorts to get her started.  

She really loves Anthropologie for clothes and stuff and I really love them for their housewares but am I going to pay $20 for a dish towel, no thanks.  So I thought, I will go check out my local fabric store and see what they've got and sew her a couple of dish towels!  Here's what I came up with: 


I am pretty proud of myself.  I haven't sewn anything freehand with out a pattern in forever. And even though technically the towel was a rectangle, I used two different fabrics and added the ric-rac finish.  I am pretty excited and hope she likes them.  And I am thinking I might make some for my sister-in-law next, maybe as a Christmas gift.

How was your holiday weekend?  Did you tackle any projects?

Wednesday, July 6, 2011

Tuesday Crafties

I seem to be in a crafting rut.  Well, maybe more accurate is I seem to be in a crafting rut when it comes to the craft projects I actually complete and photograph :)

Remember when I made these finger puppets to send to a little friend of mine?  Well, I wanted to start making a few for Adelaide to build up her little collection.  For some reason I wanted to do bugs, probably because I was inspired by this cute little swimmer.  So here's what I made:


A book worm, a lady bug and a bee.  The photo didn't turn out very well but the bee has hand stitched detailing on the wings.  

Anyhow, I have a few crafties I want to tackle to get me out of my rut.  For fun here is what I am cooking up:

1)  I want to sew a nursing cover as a gift for a friend (I have a beautiful Amy Butler fabric and everything...I just need to you know, sew it) 

2)  I want to embroider a bib necklace to add some edge to my summer wardrobe and try some new color combos.  

3) I need to sew some curtains for the little miss's window in her room.  I have the fabric and style picked out I just need to go buy the fabric and sew the panel up.  Details, details.  

I think that's it for now...What are you dreaming up in the way of summer projects?

Tuesday, June 28, 2011

Tuesday Crafties

Happy Tuesday!  We are off to a slow start this week, since our weekend was so full of fun and celebration.  But I do have a little crafty bit to share with you.  Little miss got a new little romper this weekend as a gift and I decided that it needed a matching head band.  So even though you have seen me do head bands for the wee babe before here is another one.

I think this one is way better than my previous attempt because this time I thought about the placement of the leaves in relationship to the elastic and her head.  I sort of forgot that last time and they stuck up like little feathers on an Indian head dress.  

I made this one with felt and tried a bit different style.  Here it is on our little model:


I know, I know, its huge on her head, but its so stinking cute!  

Wednesday, June 15, 2011

DIY Nursery Mobile How-To

For this week's Tuesday Crafties I shared the mobile I made for the little miss's room.  Now I thought I would share how I made it so you could make your own!

To make your own you'll need:
the inside hoop of a needle point hoop
half a skien of yarn
various colors of felt 
embroidery thread 
craft glue (I like FabriTac)
a sharp pair of scissors 
and stuffing (not pictured)


To start I took the hoop and placed a thin dot of glue on the inside lip to tack my yarn down.  Then I wrapped the entire hoop in the purple yarn I had chosen.  When you have made it all the way around, secure the finishing end with another dot of glue and let dry.  To keep from holding the loose end down while it dries I used a small plastic clothes pin to hold it securely until it was done. 


Next, while the glue is drying cut your mobile shapes out of the colored felt.  I chose birds and free handed the first one and then used it as the template for the rest.  You could easily do circles or flowers or another kind of animal for yours.  Cut out two identical shapes for each color. 


Here are my bird bodies and wings above.  After you cut out your shapes, choose your thread.  At first I thought about doing contrasting colors for the stitching but then decided to go tone on tone. I also chose dark brown and dark blue thread to do the eyes.  First I used a double French knot stitch to make the eyes on each body.  Next I glued the beak on to the inside sides of one of the bodies.  Then I stitched up the body, making sure that I stuffed the stuffing in before finally closing it up.  After that I put a little stitch around the wings and glued them on as well.  This step takes the longest because of the all the hand stitching, even though I consider myself pretty quick.  To save time you could sew them on a machine, I just like the folksy sort of look of the hand stitching and thought it contributed to the overall look I was trying to accomplish.  


I tried to do them in as many colors and I could and to try to balance light and dark, bright and muted colors.  I think they turned out so cute!


I set the cute birds aside and returned to my yarn hoop to create the hanging apparatus.  To make the hanging part I took the same yarn I used to wrap the hoop and measured out nine pieces of yarn roughly five yards long each.  (I chose a really long length because we have high ceilings and I wanted a little extra to drape when I hung it)  I divided the yarn into groups of three, and folded them in half, so I had six strings.  I then tied them to the hoop 1/3 of the way around.


With each set of six strings I divided them into threes and braided the yarn about 12 inches.  I did this for each set. I used a chip clip to hold the braid and keep it from unraveling while I braided the next. When I had them all braided, I gathered them together and held the whole thing up so I could make sure the hoop was level.  Once I had it level I tied all the yarn into one big knot.  


Then I took the large group of yarn and redivided it into thirds and braided the rest of the two and a half yards or so.  When I only had about 9 inches of yarn left I tied the whole thing off and trimmed the yarn evenly to create a tassel at the end.  

To affix the birds to the mobile frame I first strategized to stagger the birds so that they would alternate light and dark, bright and muted and not place two that were similar in color too close to each other.  I also sewed together ten birds so i decided to hang two sets of three and two sets of two to create a staggered look as well.  I then took a quilting needle (read needle with an eye large enough to get yarn through) and used it to thread the yarn through the center of the birds.  I tied the yarn off under the last bird and then tied the top of the strand of birds to the hoop.  

Ta-da! Here is the final project.  


Pretty cute huh?  I thought about adding a few strands of tinier birds through out but for now this is perfect!  And the nice thing about it is it's soft so in the night if bump my head on it it doesn't hurt and it also doesn't set off a bunch of noise and lights like some mobiles! 


If you try this project I would love to see how you adapt it and make it your own!  If you don't want to give it a try but want one, shoot me a message and I can make you one.